Iot Shelly Gate Opener With Home Assistant
I recently built a set of RV gates to get into the back half of our property. I acquired a pair of Mighty Mule MM360 gate openers to open the gates. The MM360 is a medium duty gate opener, but was more than capable of controlling the gates I welded, despite them being constructed of oil field pipe and weighing probably around #300 lbs each. One of these I won on an auction site and the only thing wrong with it was that the transmitter didn’t work. After a bit of tinkering I realized that the on board connections to control various accessories worked fine. I was able to activate the gate by simulating a momentary button press by shorting the two wires together between ‘Common’ and ‘Cycle’.

The strategy
WiFi connected:
I want something that will connect over Wifi. I have a Unifi UAP-AC-M Access point out on our horse barn that gives me a really good wifi signal at the gate.
Maintain original function:
I don’t want something that should my WiFi network go down that the gate is unusable. I want to maintain a local network control as well as local physical control (fancy speak for a doorbell switch).
Aesthetically pleasing:
It’s too easy to create something that looks like it fell out of the pocket of one of the Borg members. I want something to fit the aesthetic of the property while giving me the geeky goodness I so desire.
The Implementation
I started down the path of an uber slick ESP8266 board with a mosfet relay, DC voltage regulator to power from the 12V battery that runs the gate..blah blah blah. I ran into an issue where on a power reset the ESP8266 wouldn’t boot and the 12V circuit would open which is basically the equivalent of your annoying nephew holding down the gate button. I decided I would save some frustration and use something that is pretty close to perfect for this type of implementation…the Shelly 1.
The Shelly 1 controller can be powered by 12V or 120 depending on the jumper setting.
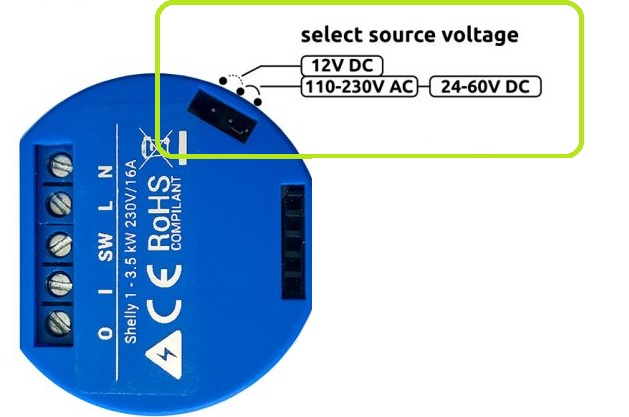
The fantastic thing about this is that I can keep my original plan intact by feeding the 12v power from the battery that powers the gate, it’s super small, gives you local control, and integrates into Home Assistant.
The Shelly is a great little device. You’re able to use a variety of voltages, AC or DC, to power it while not affecting the switching voltages you want to control. A perfect article I stumbled across is here
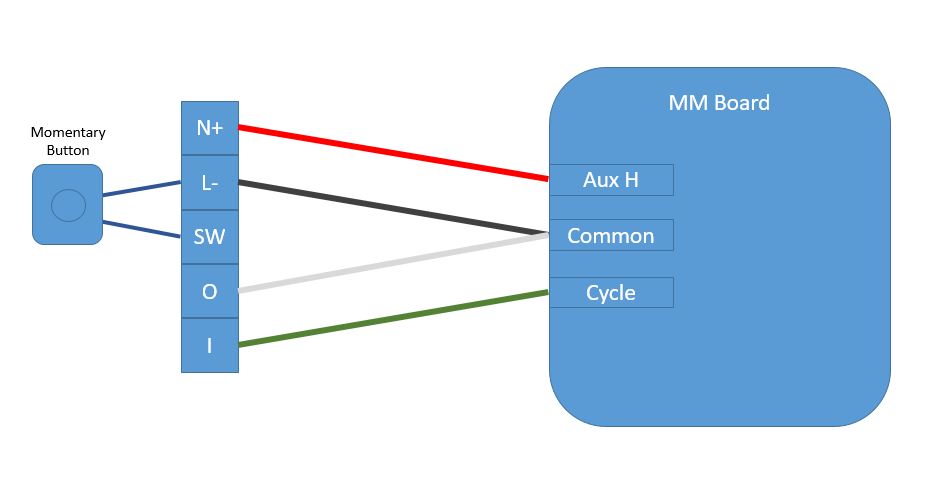
So if we look at the pinout of the Shelly 1, it’s pretty straight-forward what we can do. N+ for power, L- for common, SW is our switched input, and I/O stand for In and Out.
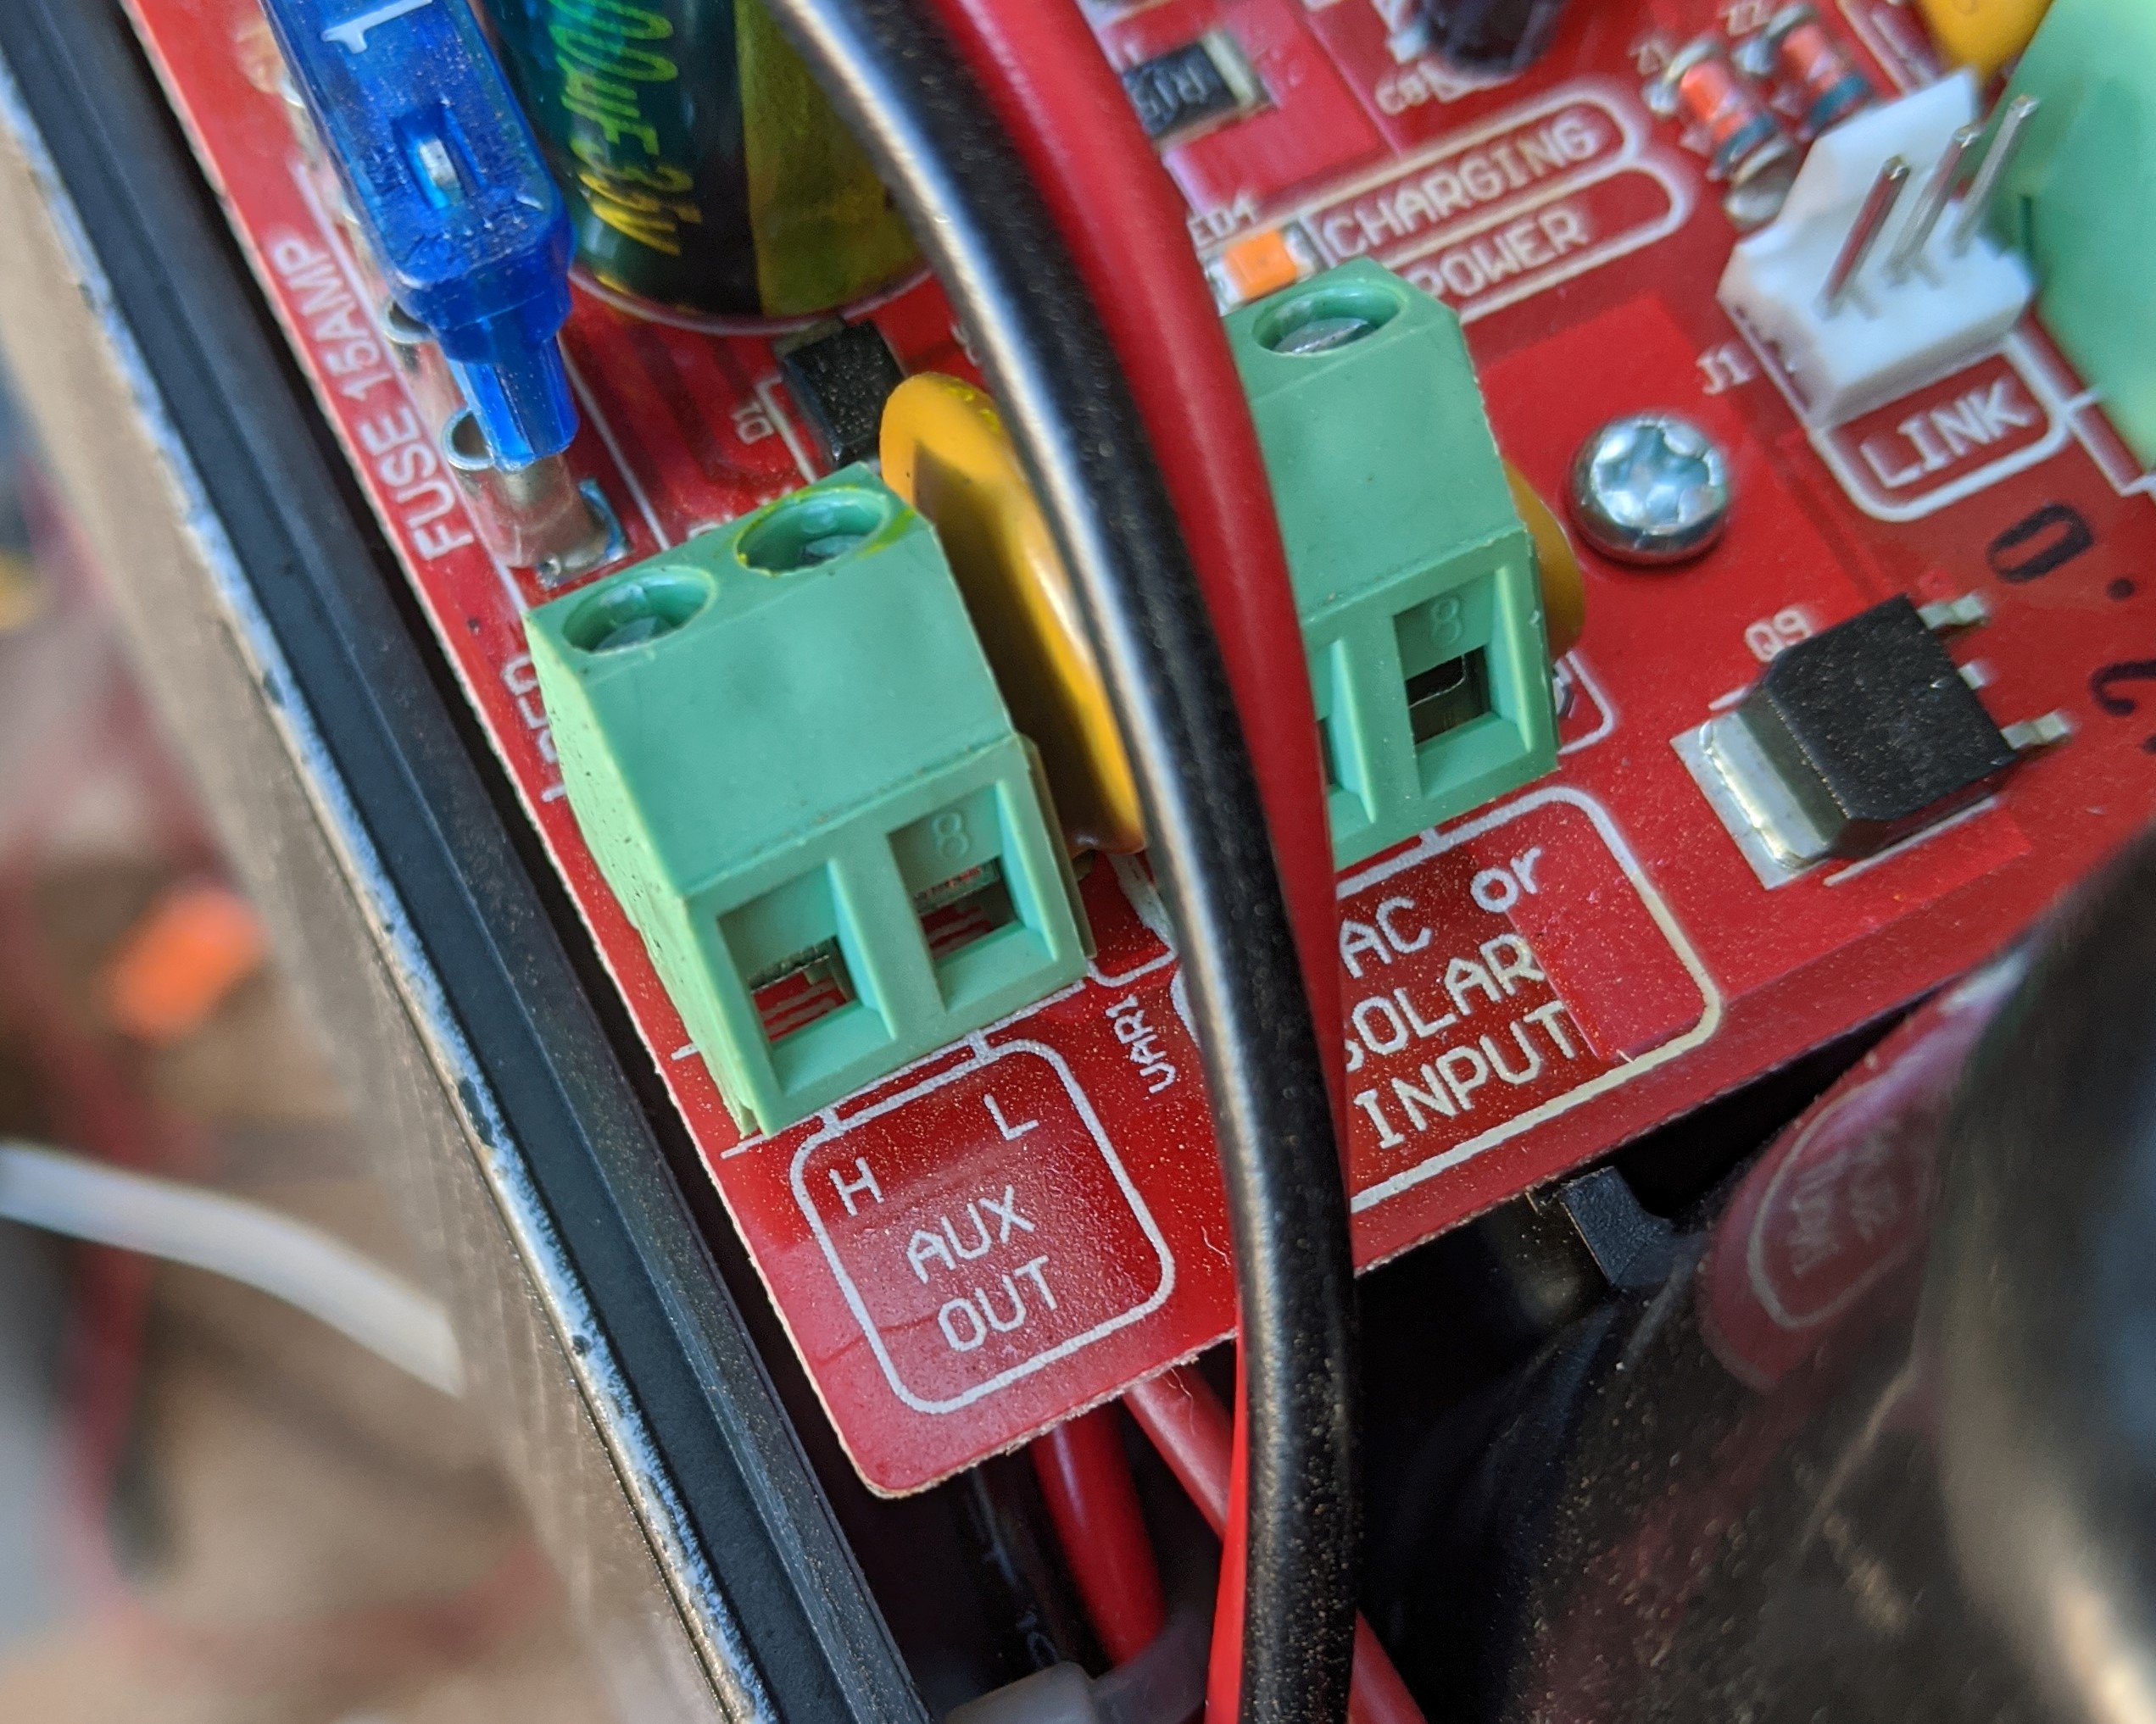
Referring back to the image of the Mighty Mule board above, you can see the AUX output with H and L options. Luckily for this project, the ‘H’ option is a stable 12V power source.
Our simplified wiring schematic (I’m not an EE) looks something like this:
Physical stuff…
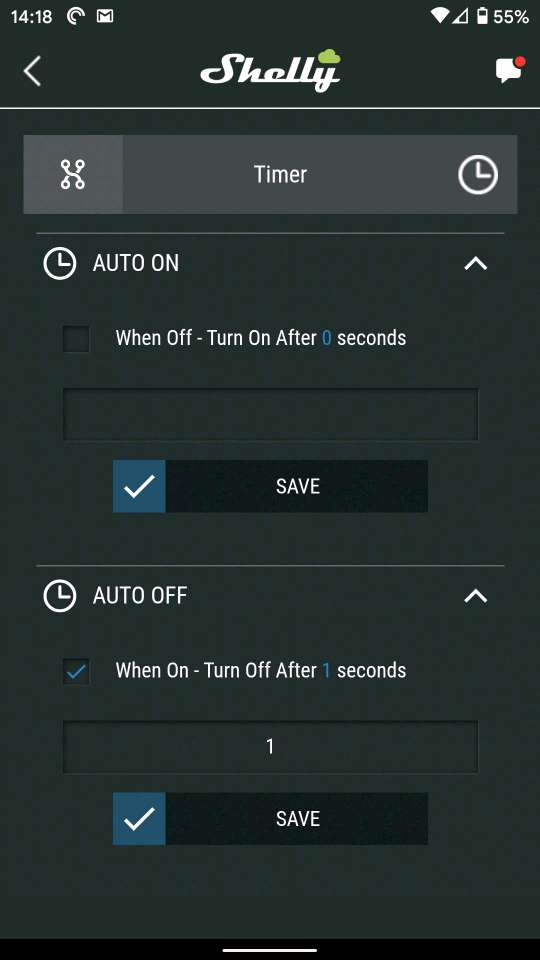
So now we have a simple device that is getting power from the Mighty Mule board, and we have a switched input that works via a push-button, OR via the electronic switch via the Shelly phone app. I’m not going to go into the Shelly setup, there are plenty of places to find that info. The one thing that is critical however is the ‘Timer’ configuration. As the shelly is a switch, I don’t want to have to switch it on, then quickly switch it off. Luckily there is a timer function on the Shelly. I set this to 1 second. I can turn the switch on, then it automatically turns off after one second, exactly what I need to simulate an RF door opener.
I mocked this up on my project desk and confirmed that everything was working. I used a 12V power supply to act as my board power, a small strip of 12V leds to ensure my ‘Cycle’ circuit was closing as desired and that the timer function was seemingly solid.
Home Assistant configuration
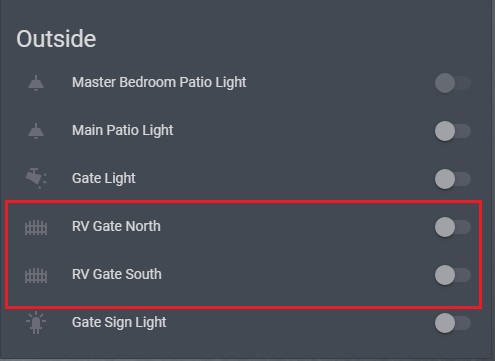
I use Home Assistant for my home automation platform. In the past I have utilized a local, dockerized MQTT server to control my Shelly devices. Recently I stumbled onto an integration in the Home Assistant Community Store for Shelly. The GitHub project can be found here. Once this is installed and configured any new Shelly device you setup in the app is dynamically configured in the Home Assistant interface. After a quick rename and some Lovelace updates, I have the two Shelly devices configured in my Lovelace UI.
More physical stuff…
Now that everything in my POC appears to be working, I need to prepare the physical button setup. I found some small, discreet momentary buttons and a couple small project boxes on Amazon. Drill a few holes, strip a few wires, and voila, you have a fairly compact, clean looking wire-up.
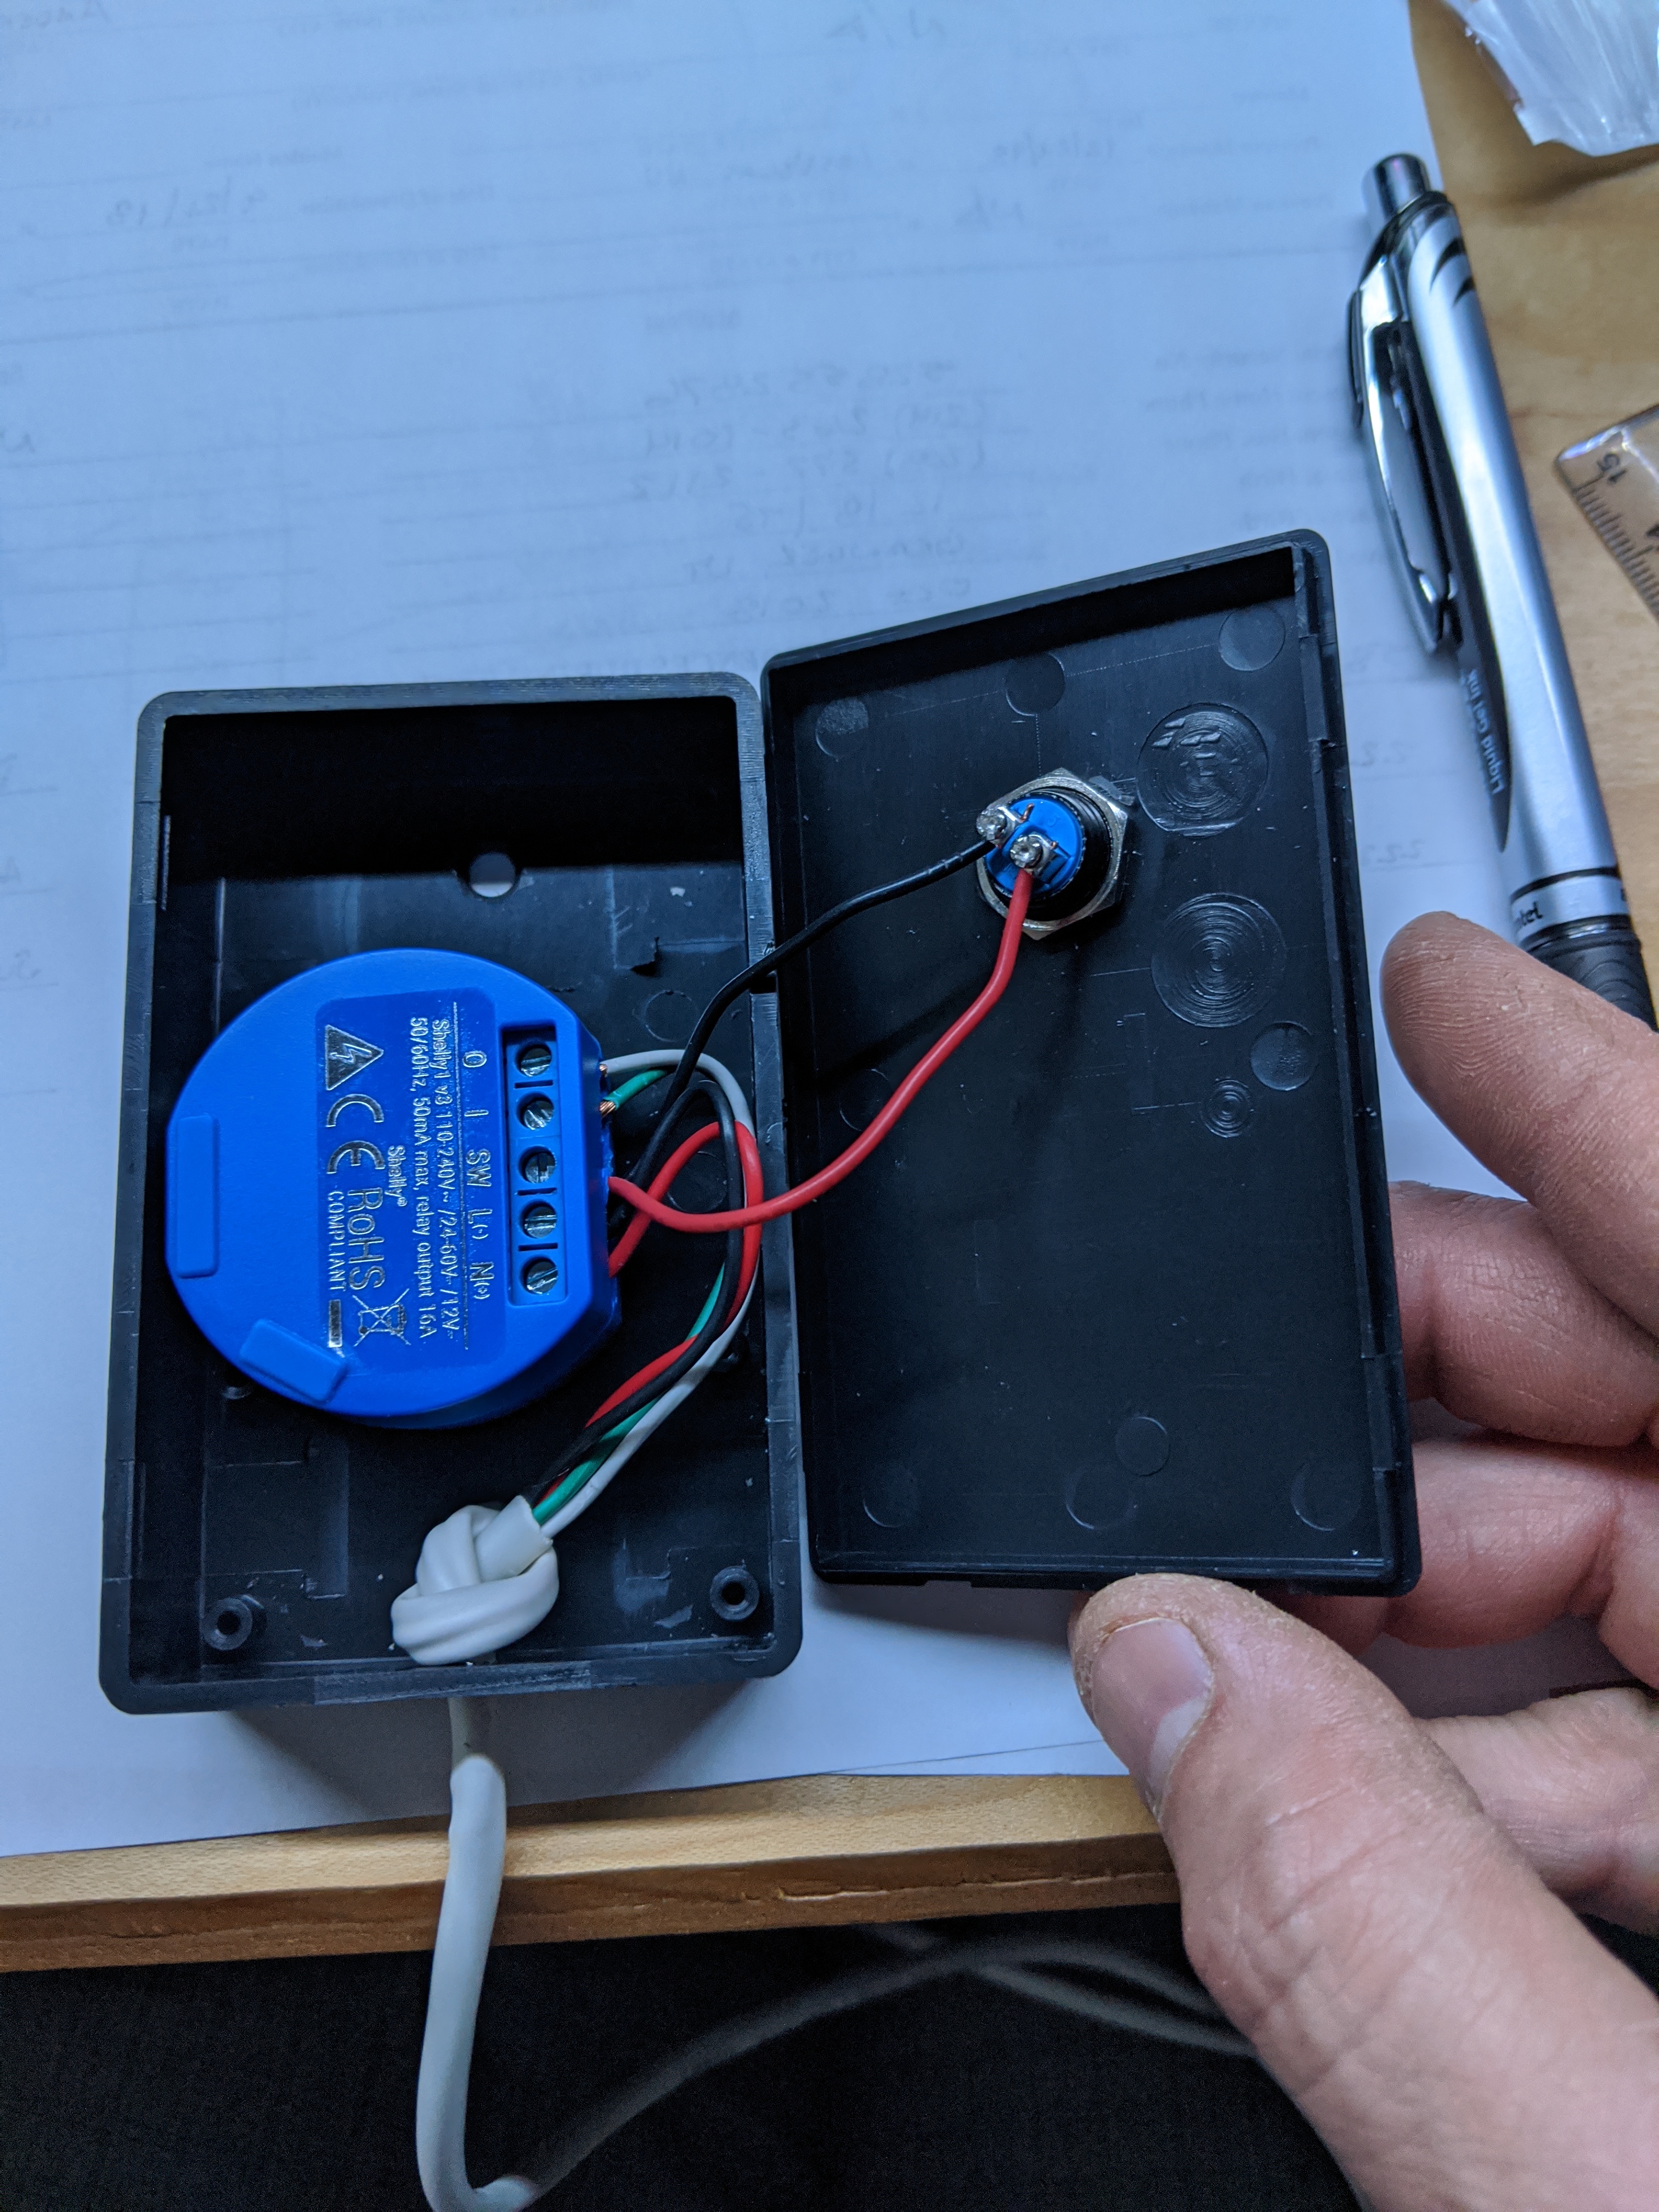
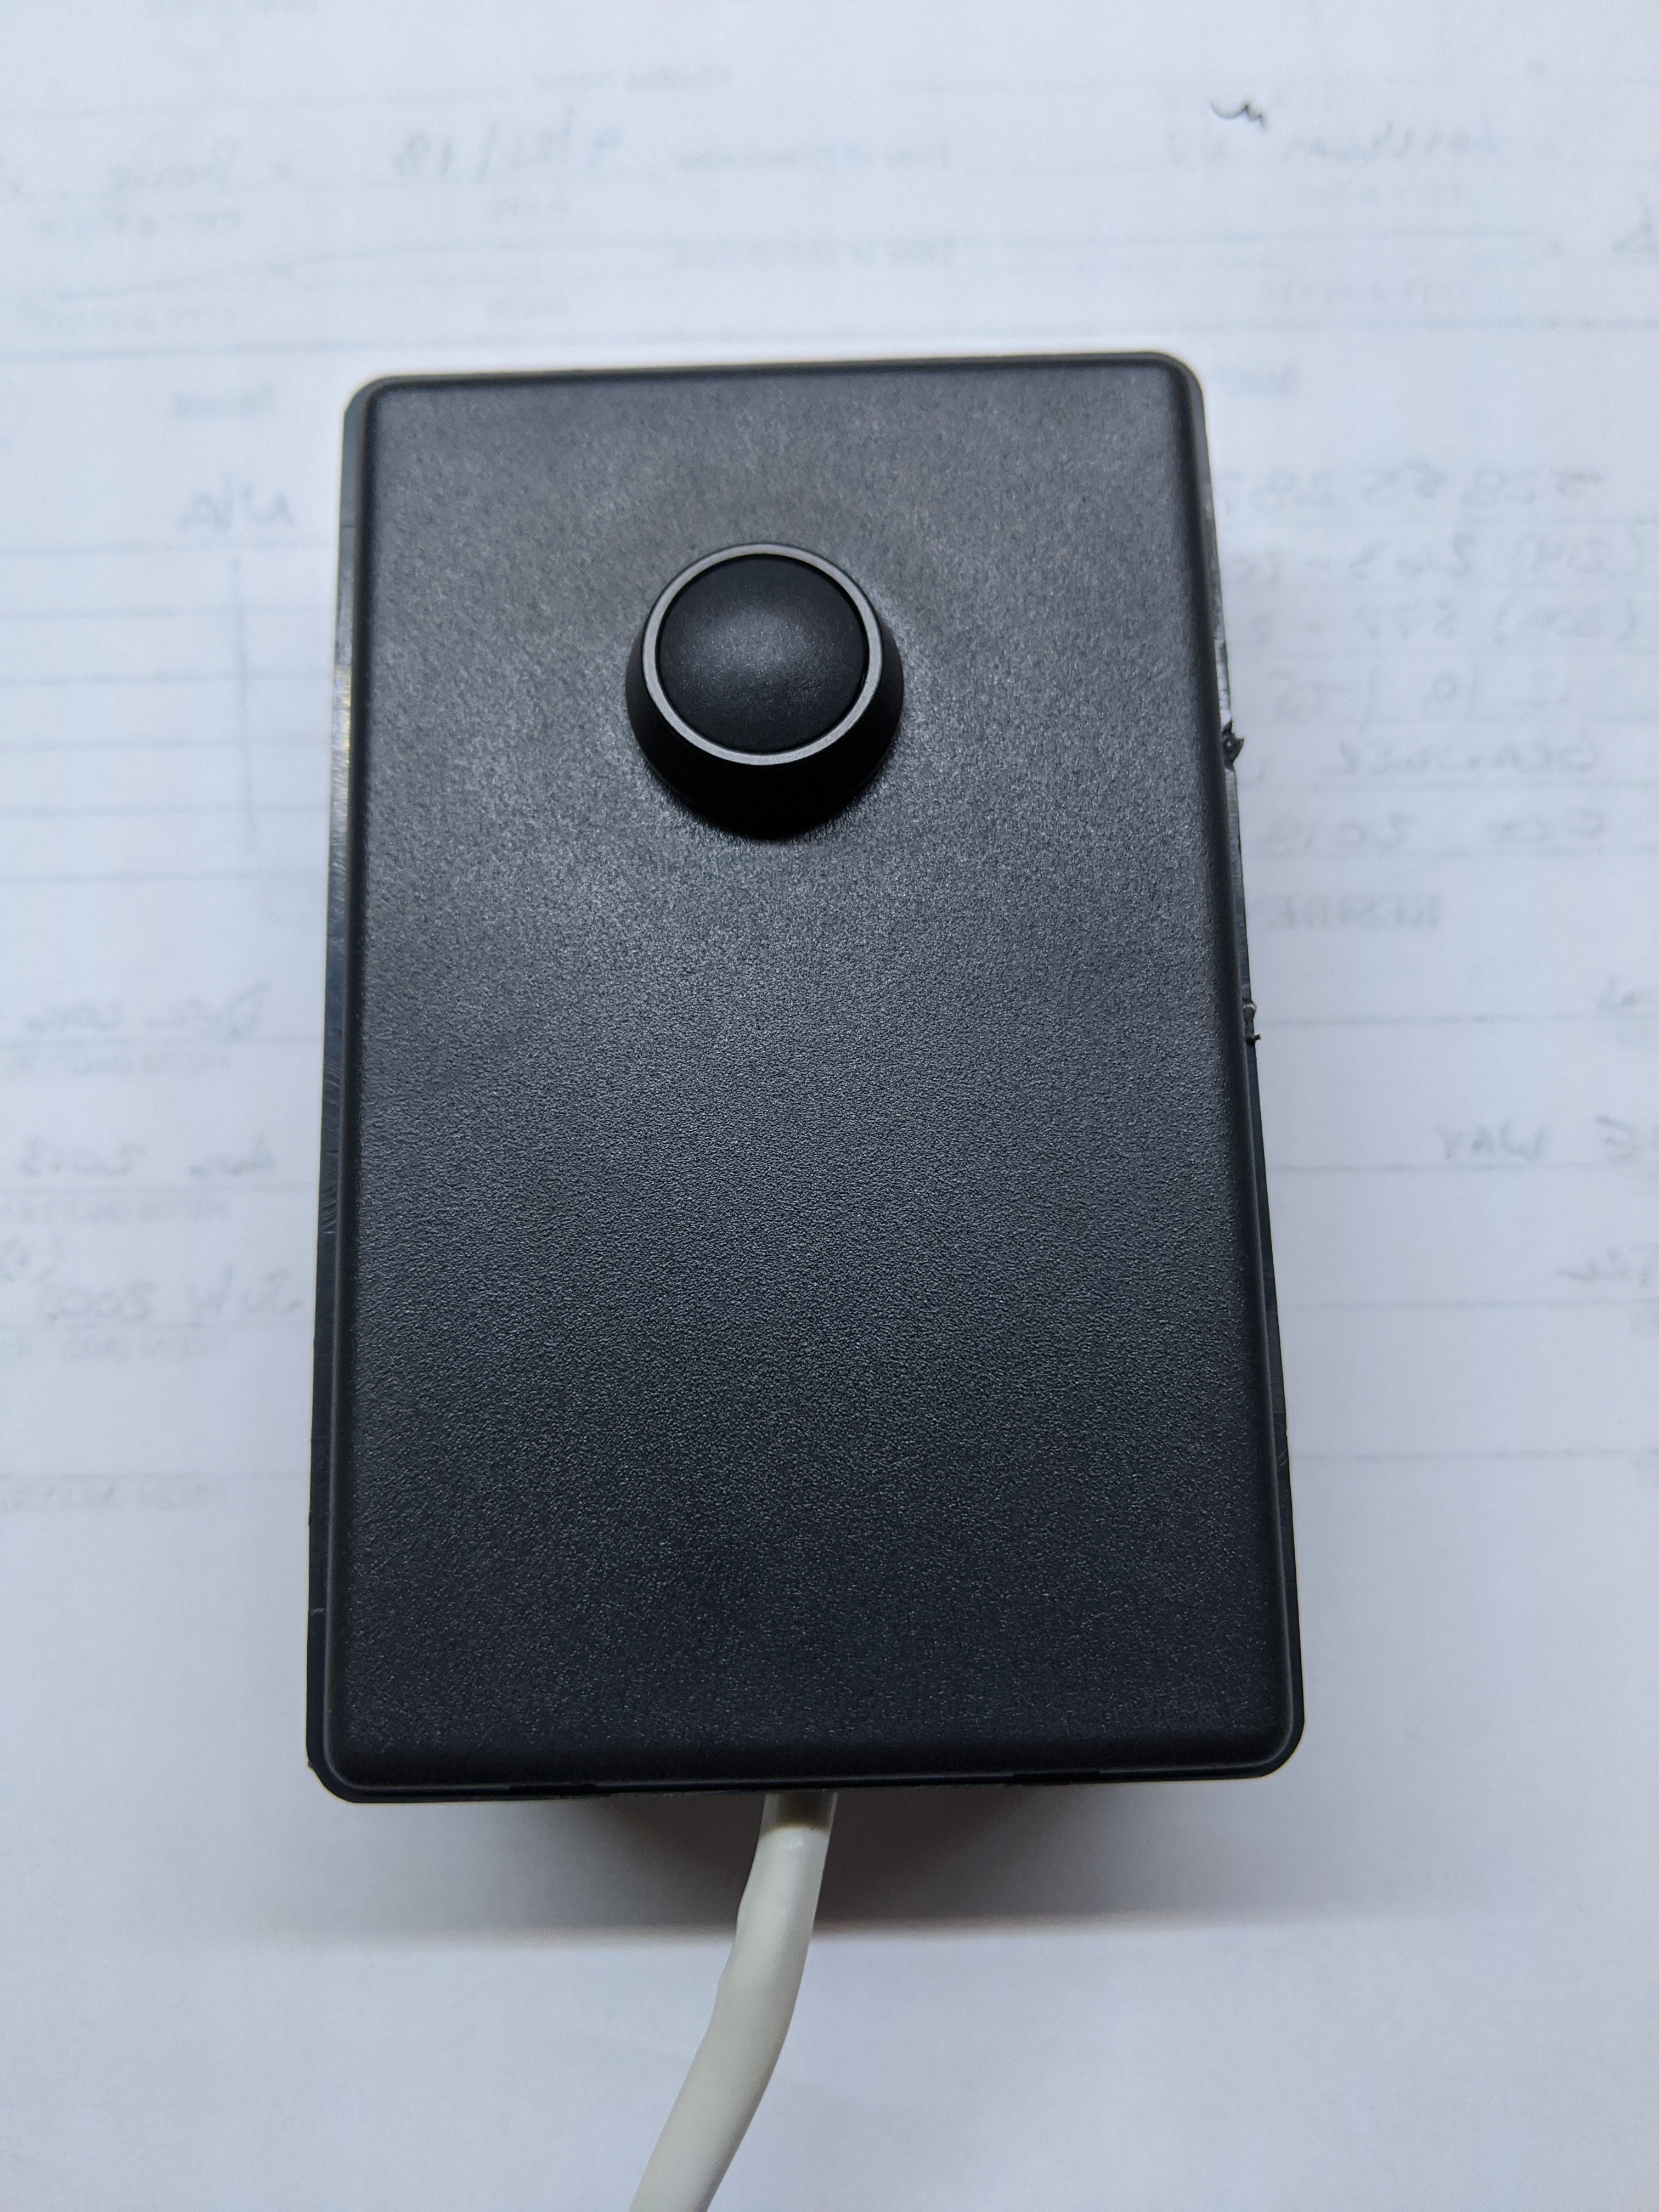
And after it’s closed up…
Putting it all together
Physical install was fairly trivial. Following our diagram above, I quickly wired everything up to the Mighty Mule board.

I sealed up some of the gaps to protect against rain (not much of a problem here in AZ) and attached the box to the wall next to each gate.
Here is the final assembly:

All in all it turned out great and was a fun project from designing to welding to geekery.


Leave a comment